GitLab CI
Connect GitLab CI/CD pipelines to BuildButler via a group-level webhook or the CLI reporter.
Tip
GitLab Ultimate users: Use a Pipeline execution policy to centrally inject BuildButler jobs into every pipeline — no changes needed in individual repositories. See setup guide below for CLI Reporter.
Send build results, job stages, and test data from GitLab CI to BuildButler using a zero-config group-level webhook or the @buildbutler/ci CLI reporter.
Option 1: Group Level Webhooks
Tip
The group-level webhook (Option 1) is the recommended approach — it requires no per-project changes and works automatically across your entire group.
Configure one webhook on your GitLab group and every pipeline across all projects is automatically reported to BuildButler — no per-project .gitlab-ci.yml changes needed.
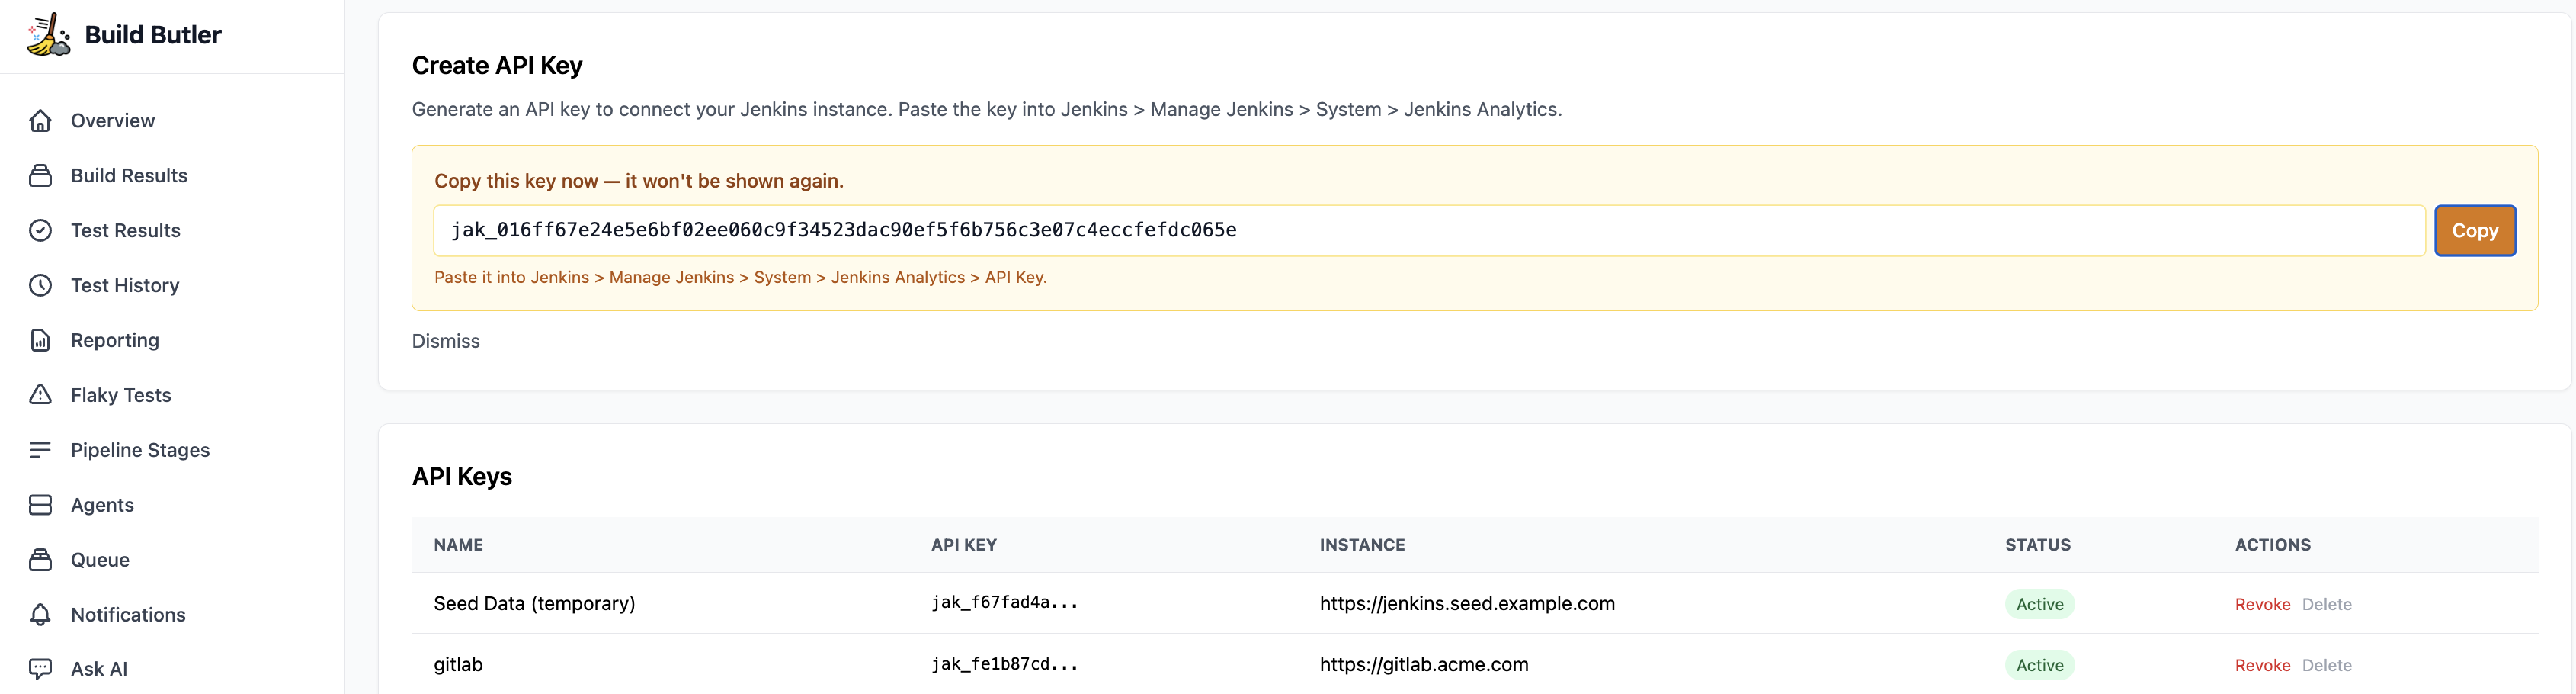
1. Generate an API key
- In the BuildButler web app, go to Settings → Add API key. Copy it — you'll need it in the next step.

2. Add the webhook
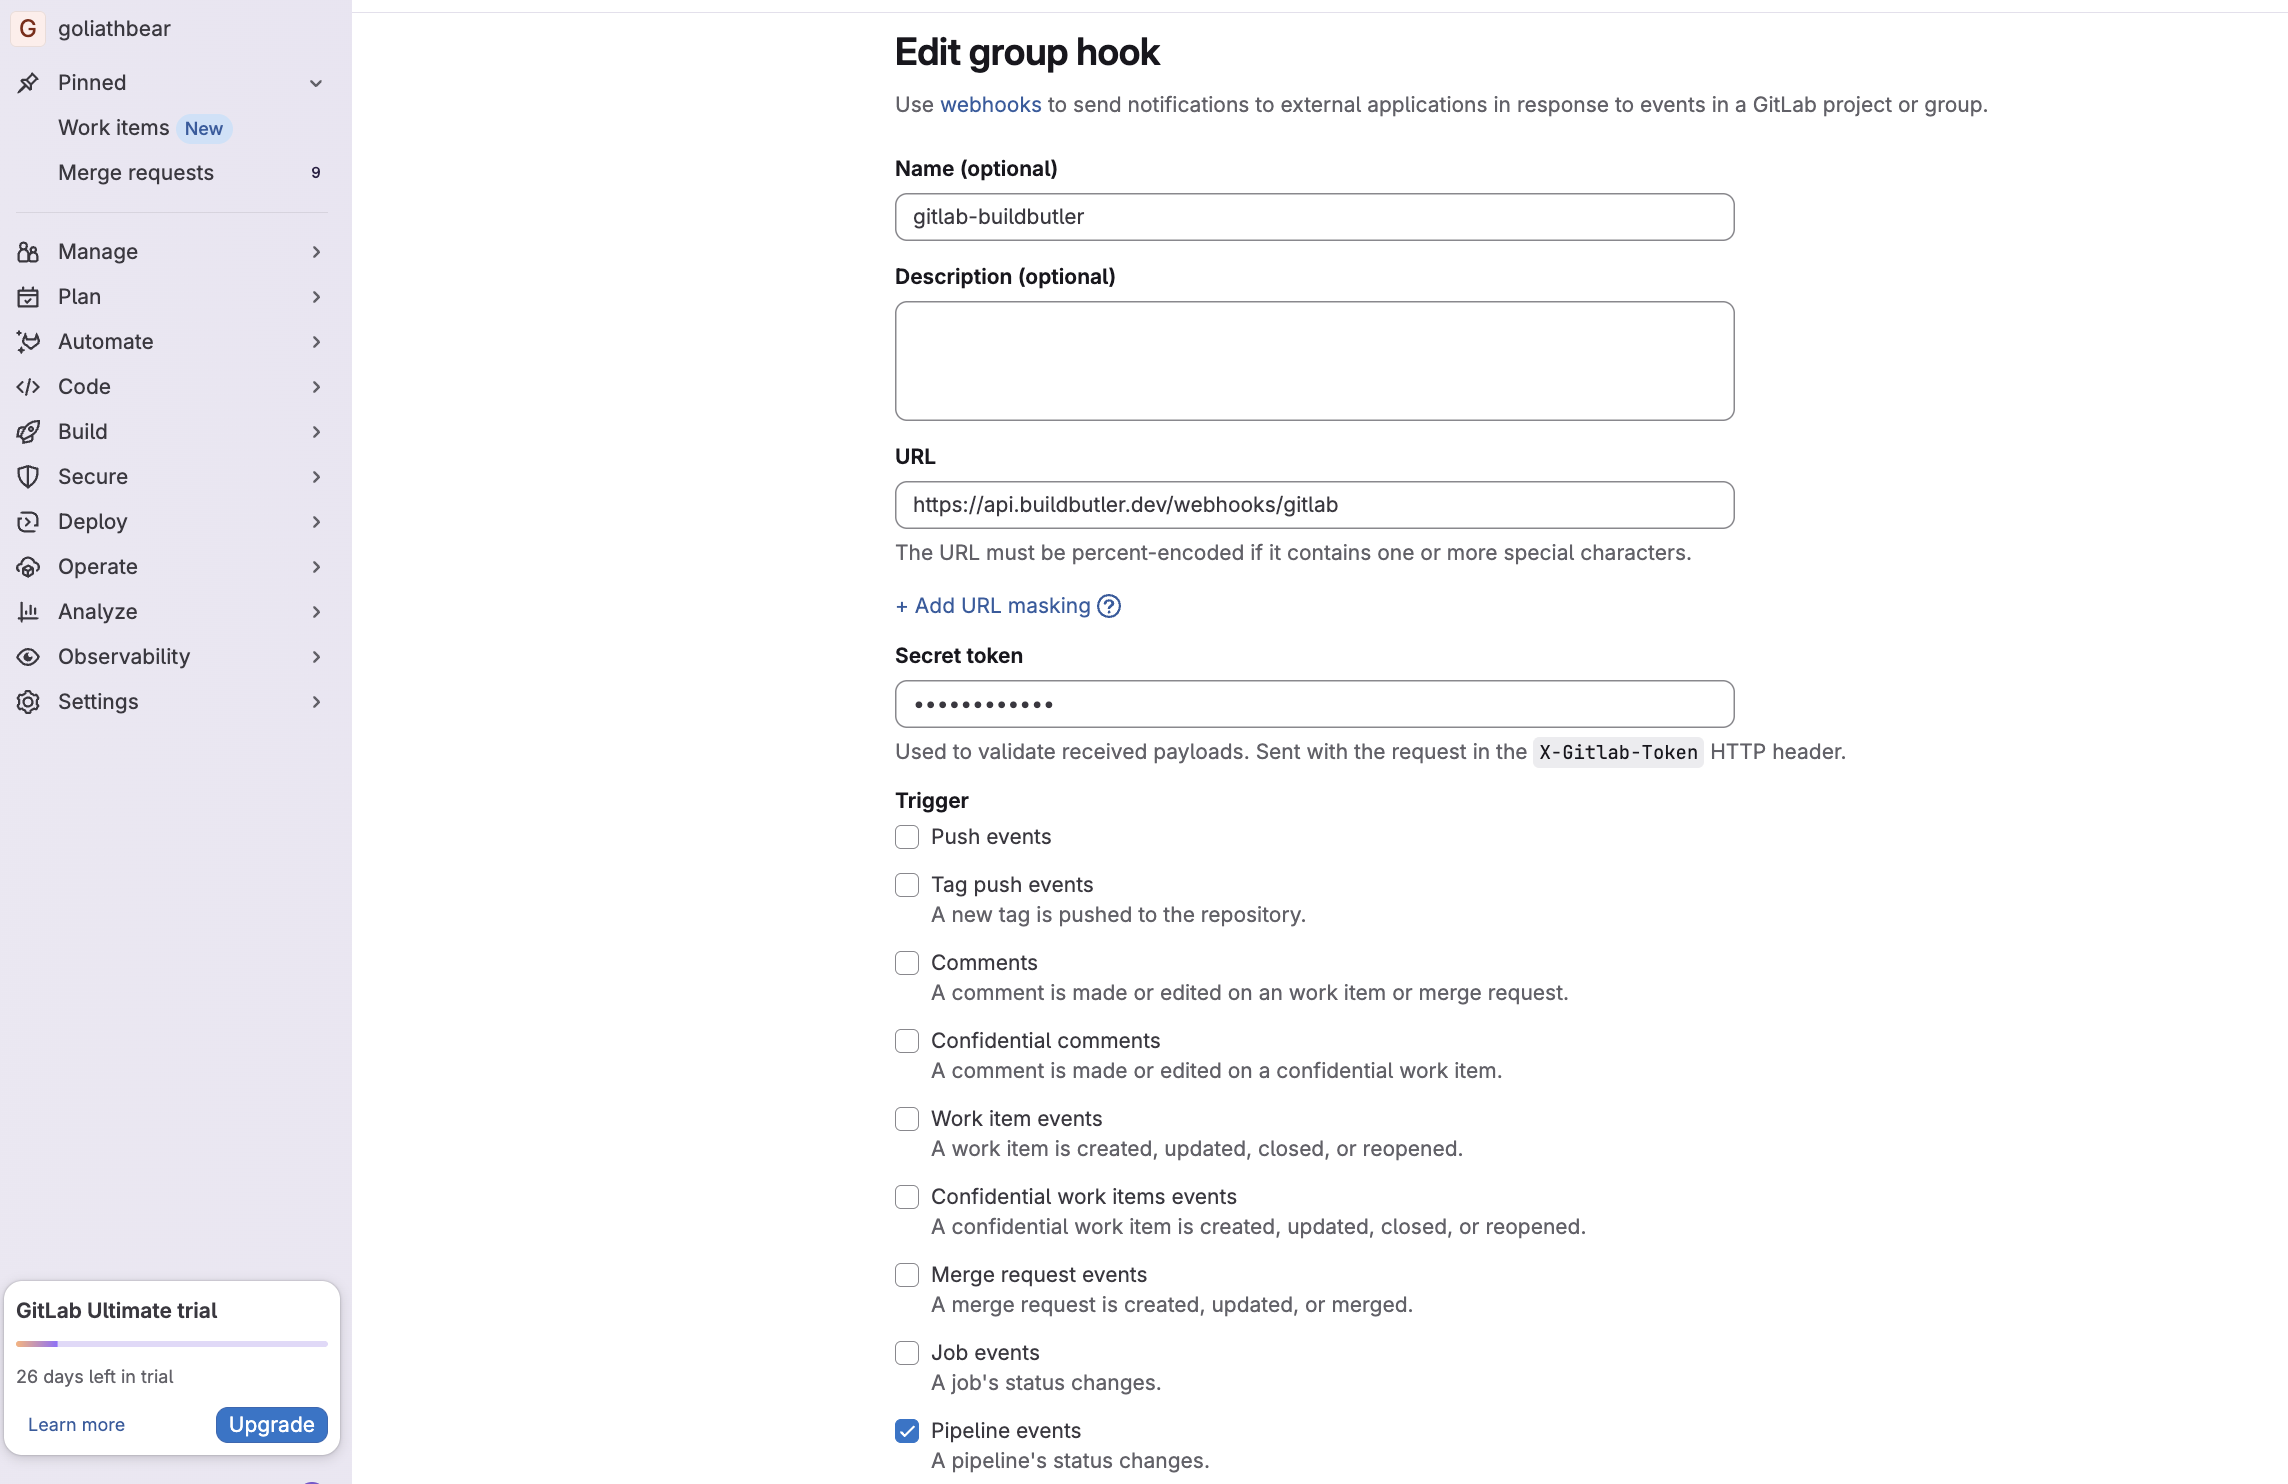
- Go to your GitLab group → Settings → Webhooks → Add new webhook
- Fill in the form:
| Field | Value |
|---|---|
| Name | buildbutler-webhook (or any name) |
| URL | https://api.buildbutler.dev/webhooks/gitlab |
| Self-hosted URL | http://your-server:3000/webhooks/gitlab |
| Secret token | Your BuildButler API key |
| Trigger | Tick Pipeline events only — leave all others unchecked |
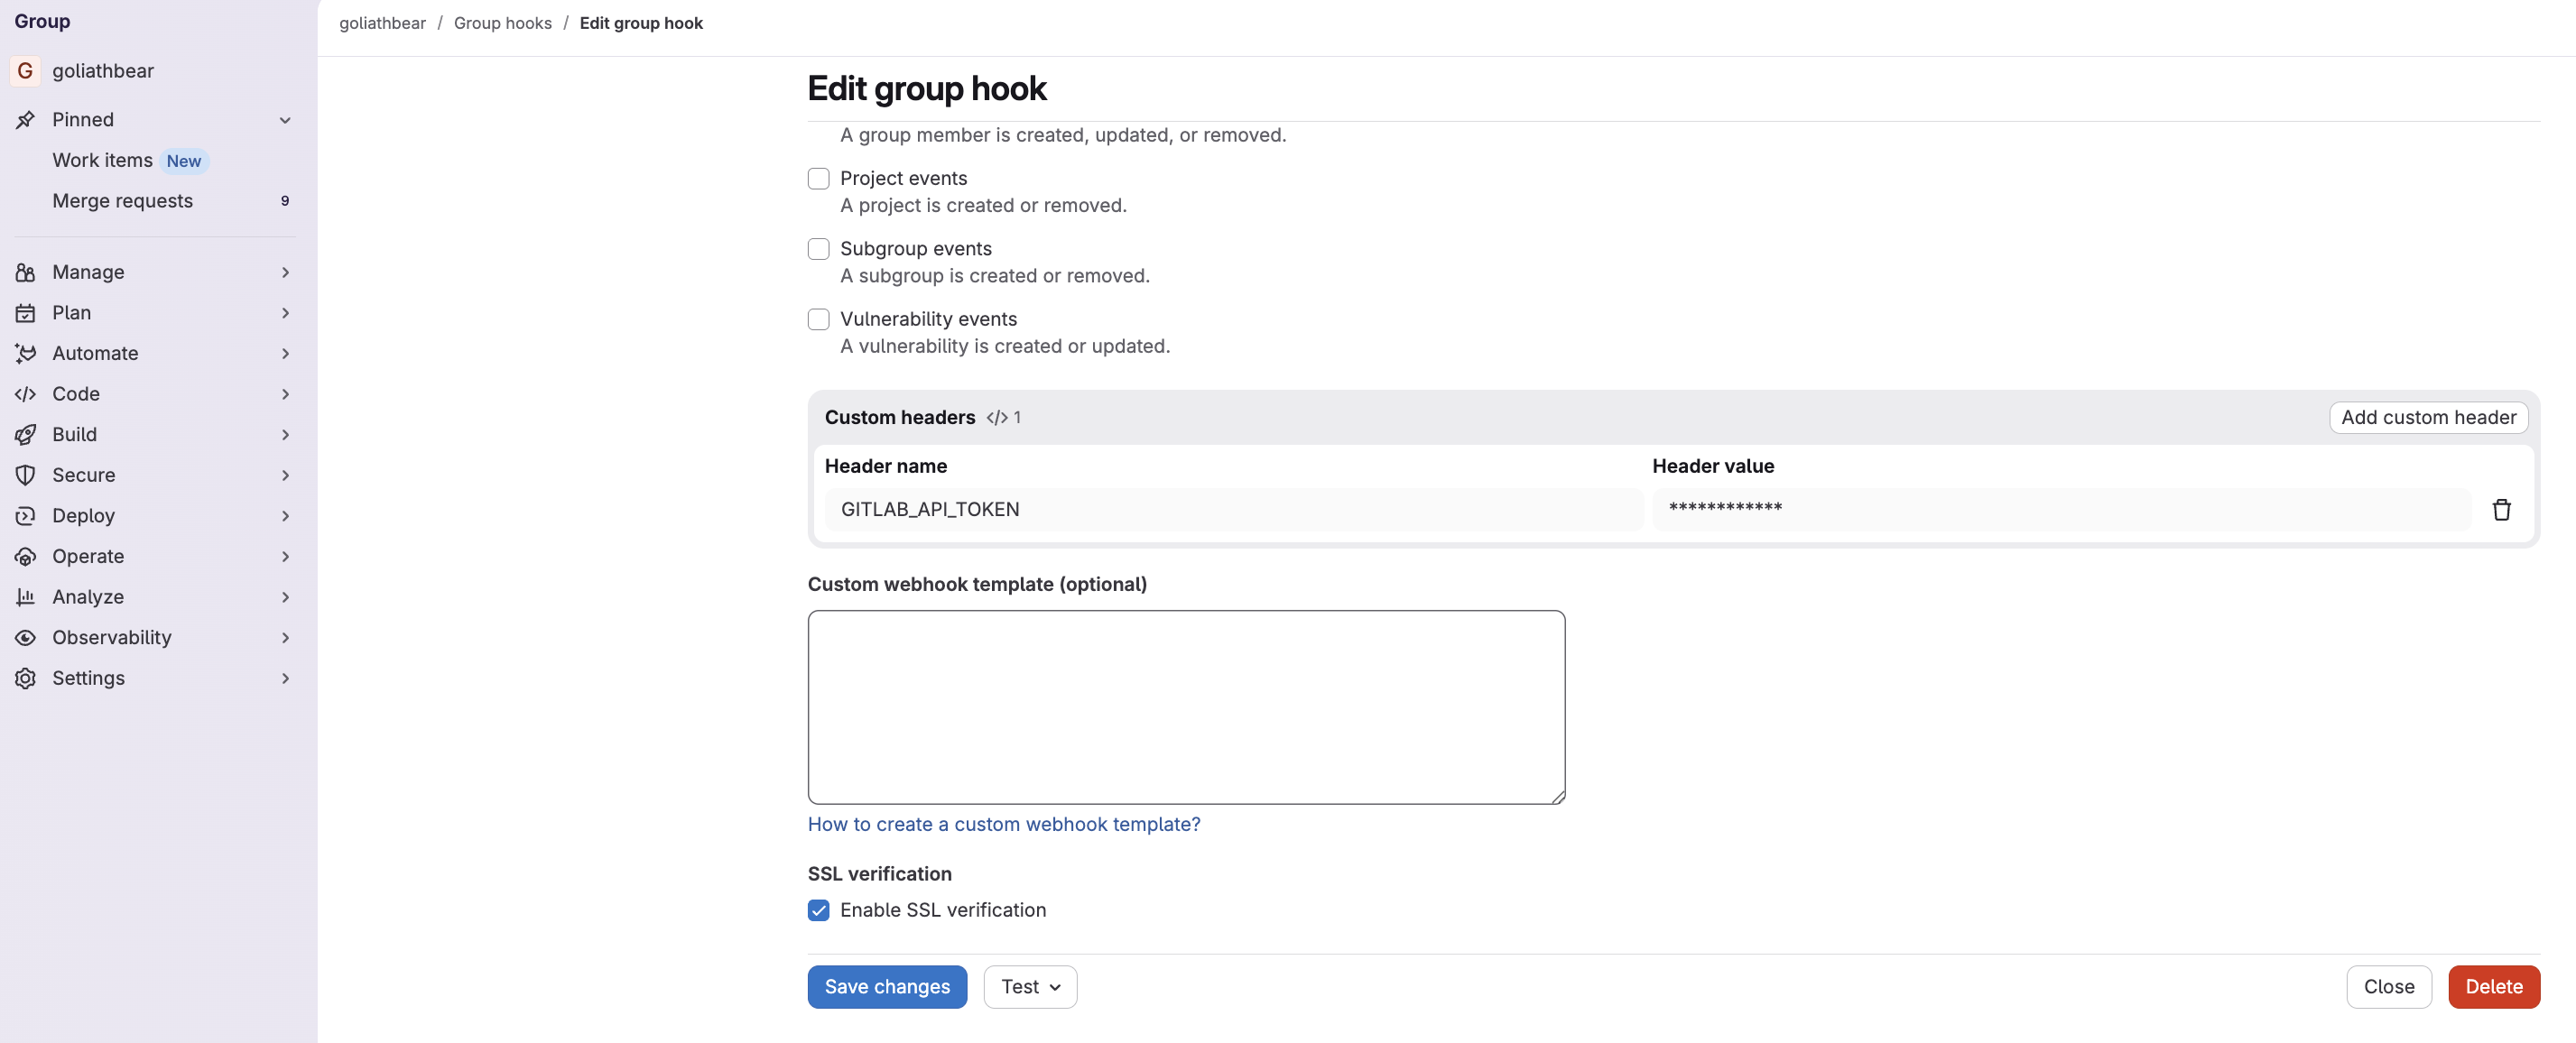
| Custom headers | Add a custom header named GITLAB_API_TOKEN with your GitLab access token — obtainable at the group or repo level |
- Click Save changes
The secret token is sent with every request in the X-Gitlab-Token HTTP header — this is how BuildButler authenticates your webhook.
3. How it works
- Only terminal pipeline states (
success,failed,canceled) are stored — in-progress events are acknowledged and ignored - Job stages and runner info are extracted directly from the webhook payload — no extra API calls needed
- Trigger a build in GitLab. Within a few seconds it should appear in the Build Results page in the BuildButler web app.
Option 2: CLI Pipeline Reporter
Tip
If webhooks are blocked in your organization, the second option is to add BuildButler CLI Reporter at the repo level or using a pipeline execution policy to centrally inject BuildButler jobs into every pipeline.
1. Generate an API key
- In the BuildButler web app, go to Settings → Add API key. Copy it — you'll need it in the next step.
2. Set up CI/CD variables
Add the required credentials at the group level so they're available across all projects.
- Go to your GitLab group Settings → CI/CD
- Expand Variables and add:
| Key | Value | Notes |
|---|---|---|
BUILDBUTLER_API_KEY | Your BuildButler API key | Found in BuildButler Settings → API Keys |
GITLAB_API_TOKEN | Your GitLab access token (glpat-...) | See Generate a GitLab Access Token |
2. Generate a GitLab Access Token
- Go to GitLab → Preferences → Access Tokens
- Click Add new token, name it
buildbutler - Grant scope: read_api
- Click Create personal access token and copy it
For group or project-level tokens, navigate to the group/project Settings → Access Tokens instead.
3. Add the reporter job
Key settings:
stage: .post— runs after all other stages completewhen: always— runs even if earlier jobs failTEST_RESULTS_GLOB— glob path to JUnit XML test results; remove if you have noneallow_failure: true— prevents a reporting failure from blocking your pipeline
Option 3: Inject BuildButler
This feature requires GitLab Ultimate. Pipeline execution policies are not available on Free or Premium tiers.
Use a Pipeline execution policy to automatically inject the reporter job into every project pipeline in your group.
1. Policy repository
Create a dedicated repository in your group (e.g. buildbutler-policy) and add .gitlab/ci/buildbutler.yml:
2. Create the policy
- Go to your group Secure → Policies → New policy → Pipeline execution policy
- Set Actions to Inject with the CI file from your
buildbutler-policyrepository - Set Variable option to Deny to prevent projects from overriding the API key
- Click Create policy
3. Link the policy project
- Go to Secure → Security configuration and set the Policy management project to your
buildbutler-policyrepository
Once configured, every pipeline in the group includes the reporter automatically.
Data mapping
| GitLab | BuildButler |
|---|---|
| Group / Project | Server |
| Pipeline | Build |
| Job | Pipeline stage |
| Test report | Test results |
| Runner | Agent |
Troubleshooting
| Symptom | Likely cause | Fix |
|---|---|---|
| Builds not appearing | Missing BUILDBUTLER_API_KEY | Set the variable at group level |
401 Unauthorized | Invalid or expired token | Regenerate the access token |
403 Forbidden | Insufficient scopes | Ensure read_api scope is granted |
Webhook returning skipped | Wrong event selected | Ensure only Pipeline events is ticked |